Mobile Corner
Build Interactive Tiles for Microsoft Band
Now that you know how to communicate with the Band apps, here's another twist. Let's get interactive.
- By Nick Randolph
- 05/12/2016
As a fitness device, the Microsoft Band has a large variety of sensors of which application developers can take advantage. However, the interface on the Band is limited to a series of tiles that display data and accept input from the user.
Last time, I showed how to communicate with the Band. This time we'll get interactive and I'll walk through creating an application that periodically displays a joke on the Band. This will demonstrate not only how to display content on the Band, but also how to accept input back from the user, even if the Windows application isn't running. At the time of writing, Windows 10 Mobile is the only platform where user input can be accepted while the application running on the phone is in the background.
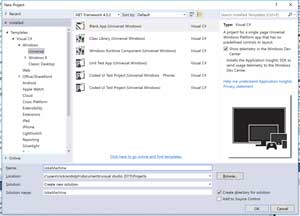
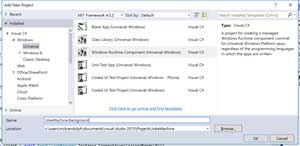
The Band itself doesn't support running third-party applications; instead, it works in conjunction with an application running on the paired mobile device. As such, I'll get started by creating a new project, called JokeMachine, based on the Blank App (Universal Windows Platform [UWP]) template in the New Project dialog, as shown in Figure 1.
 [Click on image for larger view.]
Figure 1. New Universal Windows Platform Application
[Click on image for larger view.]
Figure 1. New Universal Windows Platform Application
The purpose of this application is to display a new "Band Joke" to the user on the Band periodically. The Windows application will be responsible for periodically running as a background task, selecting a joke, and displaying a notification on the Band containing the joke. In addition, there will be a tile on the band that can be used to start and stop the notification of jokes. This relies on the background task of the Windows application being invoked when the user taps on a button on a page associated with the tile.
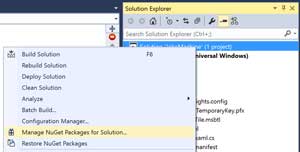
While a UWP app could manually establish a Bluetooth connection with the Band, Microsoft has already done a lot of the hard work and has provided a nice wrapper library for working with the Band. To access this library, open up the NuGet package manager interface within Visual Studio by right-clicking on the Solution and selecting Manage NuGet Packages for Solution (see Figure 2).
 [Click on image for larger view.]
Figure 2. Opening NuGet Package Manager
[Click on image for larger view.]
Figure 2. Opening NuGet Package Manager
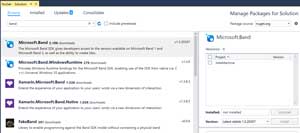
Making sure I have the Browse tab selected, I enter Band into the search box, which results in a number of results, the first of which is the Microsoft.Band SDK, produced by Microsoft (Figure 3).
 [Click on image for larger view.]
Figure 3. Adding Microsoft.Band NuGet Package
[Click on image for larger view.]
Figure 3. Adding Microsoft.Band NuGet Package
There are only a couple of UI elements on the Band with which a developer can work. Tiles, as the name indicates, are the tiles that appear on the main strip of the Band. When a user taps on a tile, they're shown one or more pages that make up the tile. In order to draw attention to changing content, a tile can display a notification in the form of either a dialog (which disappears when dismissed by the user) or a message (which is added as a page within the tile).
I'll start by creating a tile for my application, but rather than creating the layout manually in code, I'm going to use the Microsoft Band Tile Designer. The designer is currently in preview, so you can expect that there are some limitations. There are also some peculiarities to page layouts that can be a bit frustrating to work with. Here are a couple of useful links:
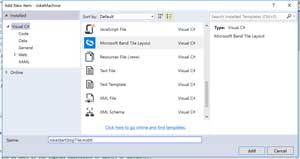
After installing the designer preview, I'm all set to create my first tile layout. I right-click on the JokeMachine project and select Add | New Item. From the Add New Item dialog, I select the Microsoft Band Tile Layout template and give the layout a name, JokeStartStopTile (see Figure 4).
 [Click on image for larger view.]
Figure 4. Adding Band Tile Layout
[Click on image for larger view.]
Figure 4. Adding Band Tile Layout
The newly created tile layout will be automatically opened, showing a design surface. From the Toolbox tool window I first need to select one of the Panels that will control the layout of the page. In this case I'm going to go with the Flow Panel (see Figure 5), which I can either drag and drop on the design surface, or I can simply double-click the item to add it.
 [Click on image for larger view.]
Figure 5. Tile Layout Designer
[Click on image for larger view.]
Figure 5. Tile Layout Designer
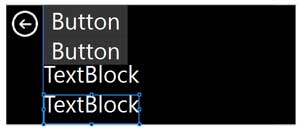
After adding the Flow Panel, which is similar to the XAML StackPanel in that it's going to present one item after another in a vertical (or horizontal) list, I add two Text Button and two Text Block elements, simply by double-clicking them in the Toolbox, resulting in a layout similar to Figure 6.
 [Click on image for larger view.]
Figure 6. Tile Layout
[Click on image for larger view.]
Figure 6. Tile Layout
Once added to the layout, I need to go through each one, select it (by tapping on it on the design surface), and adjust one or more of its properties via the Properties tool window, as per the following list:
1st Button
  ElementId: 2
  Text: "Start"
2nd Button
  Text: "Stop"
1st TextBlock
  Text: "Status:"
2nd TextBlock
  Text: ""
  Name: "txtStatus"
Next, I'll go through how you can leverage this tile layout in the application. I'll start by adding in a class, shown in Listing 1, which will contain some string literals that will be used in a couple of places in the application. I'll be using a Windows Runtime (WinRT) Component later that has some restrictions on exposing public constant values, which is why the string literals have been defined as static properties instead of const.
Listing 1: JokeConstants Class
public static class JokeConstants
{
  public static string TileId { get; } = "962A2F11-38F7-4091-AD13-76CE151FF442";
  public static string PageId { get; } = "65432F5E-3E9B-4711-998E-BB868660B325";

  public static string JokeTitle { get; } = "Band Joke";

  public static string[] Jokes { get; } = {
    "There was once a trumpet player who practiced 5 hours daily and was very conceited.",
    "He liked to toot his horn.",
    "What do you call 50,000 piccolos at the bottom of the sea? A good start.",
    "What do you call a euphonist that isn't in a military band? Unemployed.",
    "Johnny told his mom he wanted to play trumpet when he grew up. His mom said:
    \"Honey, you can't do both, pick one.\"",
    "How do you stop a guitarist? Sheet music."
  };
}
In the code behind the MainPage, I'm going to override the OnNavigatedTo method in order to call the SetupBandTile method (shown in Listing 2) when the page is displayed. The code for the SetupBandTile method acquires a reference to the first paired Band, and subsequently opens a connection to the Band so that it can query and, if necessary, add the tile for the application.
Listing 2: SetupBandTile Method
private Guid TileId => new Guid(JokeConstants.TileId);
private Guid PageId => new Guid(JokeConstants.PageId);

protected async override void OnNavigatedTo(NavigationEventArgs e)
{
  base.OnNavigatedTo(e);
  await SetupBandTile();
}

public async Task SetupBandTile()
{
  var pairedBands = await BandClientManager.Instance.GetBandsAsync();
  using (var client = await BandClientManager.Instance.ConnectAsync(pairedBands[0]))
  {
    var existing = await client.TileManager.GetTilesAsync();
    var myTile = existing.FirstOrDefault(x => x.TileId == TileId);
    if (myTile == null && await client.TileManager.GetRemainingTileCapacityAsync() > 0)
    {

      var designed = new JokeStartStopTile();
      myTile = new BandTile(TileId)
      {
        Name = "Jokes",
        TileIcon = await LoadIcon("ms-appx:///Assets/LargeIcon.png"),
        SmallIcon = await LoadIcon("ms-appx:///Assets/SmallIcon.png")
      };
      myTile.PageLayouts.Add(designed.Layout);
      await designed.LoadIconsAsync(myTile);
      await client.TileManager.AddTileAsync(myTile);
      await client.TileManager.SetPagesAsync                  (TileId, new PageData(PageId, 0, designed.Data.All));

    }
  }
}

private async Task<BandIcon> LoadIcon(string uri)
{
  var imageFile = await StorageFile.GetFileFromApplicationUriAsync(new Uri(uri));
  using (var fileStream = await imageFile.OpenAsync(FileAccessMode.Read))
  {
    var bitmap = new WriteableBitmap(1, 1);
    await bitmap.SetSourceAsync(fileStream);
    return bitmap.ToBandIcon();
  }
}
For brevity, and to highlight the steps involved in creating a tile on the Band, this code doesn't have any error handling. Particularly for code that establishes a wireless connection to a remote device, it's essential that sufficient exception handling is added to assist the user with diagnosing what's wrong. For example, if the application isn't able to find or connect to a Band, the application can present a notice to the user to ask them to ensure their Band is correctly paired to the device.
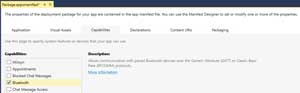
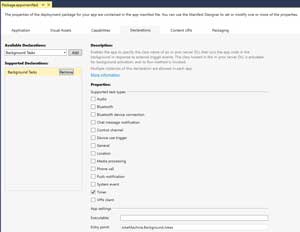
Before running the application I need to add the Bluetooth capability to the Package.appxmanifest file, shown in Figure 7. This permits the application to access the Bluetooth capability on the device.
 [Click on image for larger view.]
Figure 7. Adding Bluetooth Capability
[Click on image for larger view.]
Figure 7. Adding Bluetooth Capability
The code for setting up the tile actually relies on two images that aren't currently included in the project: LargeIcon and SmallIcon. These icons should be 46x46 and 24x24, respectively, and both should be white on a transparent background.
Now I can run the application and test to make sure the tile gets created. The first time I run the application I'll see two permission requests: The first one allows access to the Band; the second permits creation of a new tile. After agreeing to these permission requests, the Band will temporarily go into an "Updating" state where the interface is blocked while the new tile is created.
Currently, all I've done is create a static tile on the Band, based on the tile layout I created earlier. The core functionality of this application is to periodically display a joke to the user. For this, I'll need a background task that will execute periodically in order to send a notification to the Band.
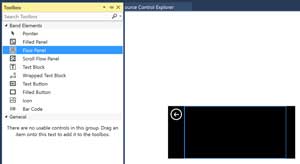
In order to create the background task, I first need to add a new WinRT Component to the solution via the Add New Project dialog (Figure 8).
 [Click on image for larger view.]
Figure 8. Adding Windows Runtime Component
[Click on image for larger view.]
Figure 8. Adding Windows Runtime Component
I need to add a reference to the new JokesMachine.Background project, to the JokeMachine application. This can be done by right-clicking on the JokeMachine project and selecting Add Reference. From the Add Reference dialog, make sure that there is a check against the JokesMachine.Background project within the Solution tab.
As the string literals defined in the JokesConstants class need to be accessible in both the JokeMachine application and the background task, I'm going to move the JokesConstants class into the JokeMachine.Background project. In doing this, I need to amend the namespace of the JokesConstants class to JokeMachine.Background, and update the appropriate in-code references to this class within the JokeMachine project.
The background task implementation is simply a class that implements the IBackgroundTask interface. I'll rename the default Class1.cs file that was created with the project to Jokes.cs. In doing this, I get prompted by Visual Studio to change the corresponding class name to Jokes.
Before I complete the background task implementation, there are a couple of other configuration steps that are required. I need to add a reference to the Microsoft.Band NuGet Package -- this is done by revisiting the NuGet package manager and adding the NuGet package to the new background task project.
It's necessary for the background task to be registered in the package.appxmanifest file (see Figure 9).
 [Click on image for larger view.]
Figure 9. Register Background Task
[Click on image for larger view.]
Figure 9. Register Background Task